

A diamond grinding wheel is one of the most cost-effective tools in any shop, but it only performs at its best when it is properly maintained. Over time, the wheel face loads up with swarf, loses its form, and starts to glaze — and the moment that happens, surface finish drops, heat rises, and cycle time climbs. This is where diamond grinding wheel dressing becomes essential. Done correctly, dressing restores sharpness, brings the wheel back to true, and adds weeks or even months to its working life.
In this guide you will learn exactly what diamond grinding wheel dressing is, when to do it, and a proven seven-step method that works for resin, metal, and vitrified bond wheels alike.
What is diamond grinding wheel dressing?
Diamond grinding wheel dressing is the process of re-sharpening and re-truing the cutting face of a grinding wheel. Unlike a conventional abrasive wheel, a diamond or CBN wheel does not self-sharpen as easily, because the superabrasive layer is far harder than the material being ground. Instead, the bond between the grains slowly wears, the pores clog, and the wheel face becomes smooth and glassy.
Diamond grinding wheel dressing removes that dull, loaded layer and exposes fresh diamond or CBN grains. It is closely related to truing — restoring the geometric accuracy of the wheel — and in most shops the two are combined in a single operation.
When does a diamond grinding wheel need dressing?
You do not need to wait for a visible problem. Watch for these signals, any one of which means it is time for diamond grinding wheel dressing:
- Burning or scorch marks on the workpiece, indicating the wheel is glazed and rubbing instead of cutting.
- Rising spindle load or grinding temperature at the same feed rate.
- Poor surface finish or a sudden change in spark-out behaviour.
- Loss of form — the wheel no longer holds the profile or the corner radius you set.
- Audible chatter or vibration that was not there before.
- Scheduled intervals — many production shops dress every fixed number of parts as a preventive measure.
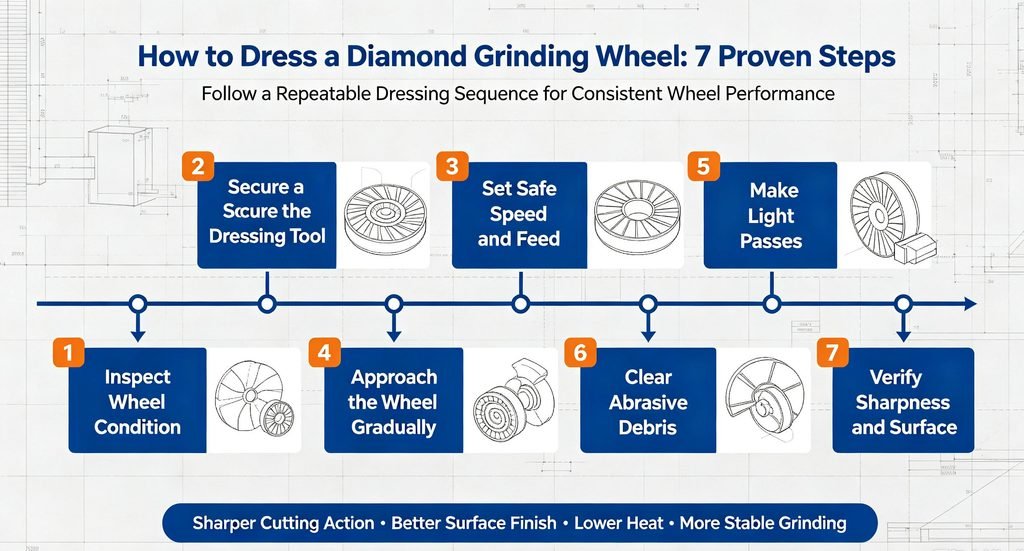
Diamond grinding wheel dressing: the 7 proven steps
This diamond grinding wheel dressing sequence works for most surface, cylindrical, and tool-room applications. Always check your machine manual and wheel supplier guidance first, because bond type and abrasive specification affect the exact parameters.
Step 1 — Inspect the wheel before you dress
Stop the spindle and inspect the wheel face under good light. Look for cracks, chips, uneven wear, or embedded metal. A cracked wheel must be removed and replaced — never dressed. Confirm the wheel is correctly mounted and the flange is clean.
Step 2 — Choose the right dressing tool
The selection of the dressing tool is the single biggest factor in the result. Common options include:
- Single-point diamond dresser — best for precise truing of straight wheels and restoring form.
- Diamond dressing roller — ideal for high-volume, CNC-controlled profiling where repeatability matters.
- Diamond dressing wheel or block — suits resin-bond wheels and general re-sharpening.
For CNC grinding of critical parts, a diamond dressing tool for CNC lathe grinding wheel gives consistent, repeatable results day after day.
Step 3 — Set the dressing parameters
Use a light pass. A depth of cut that is too aggressive will fracture the diamond layer and shorten wheel life. Typical starting points:
- Depth per pass: 0.01–0.03 mm for finish dressing, up to 0.05 mm for rough truing.
- Traverse feed: slow and steady — 0.1–0.3 mm per revolution of the wheel.
- Coolant: flood the contact zone. Dry dressing is only for specific bond types.
- Speed: run the wheel at or slightly below its normal working speed.
Step 4 — True the face first
In diamond grinding wheel dressing, if the wheel has lost its form, true it before you attempt to sharpen it. Take several light passes across the face with a single-point dresser until sparks are even across the full width. Even spark distribution is your proof that the face is flat and concentric.
Step 5 — Re-sharpen with a controlled pass
Once the face is true, make one or two additional light passes to open the bond and expose fresh grain. You will hear and see the difference — sparks become crisp and the cut feels free again. Avoid over-dressing: removing more bond than necessary wastes the wheel and shortens its life.
Step 6 — Clean and re-check
After diamond grinding wheel dressing, run the wheel briefly with coolant to flush out loosened bond and swarf. Re-check the face visually and, where precision matters, verify the profile with a form gauge or dial indicator. The wheel should be clean, sharp, and geometrically correct.
Step 7 — Record the result and set the next interval
Note the dressing depth, number of passes, and the number of parts produced since the last dress. Over time this log lets you dial in the ideal interval, which is the fastest way to cut both wheel cost and downtime. A well-maintained wheel using a quality metal bonded diamond dressing wheel will hold its form for a long production run.
Common diamond grinding wheel dressing mistakes to avoid
- Dressing with too heavy a cut and fracturing the superabrasive layer.
- Running dry and overheating the bond, which glazes the wheel immediately.
- Ignoring wheel balance after dressing, causing vibration and poor finish.
- Using a worn or blunt dressing tool, which burnishes instead of cutting.
- Dressing “just in case” too often, wasting the wheel’s usable layer.
Choosing a dressing tool for the job
Match the tool to your wheel bond and your tolerance requirements. Resin-bond wheels respond well to dressing wheels and blocks, while metal and vitrified bond wheels generally need a single-point dresser or a dressing roller for precise, repeatable truing. If you grind aircraft or high-value components, a metal bonded sintered diamond dressing roller delivers the consistency those parts demand.
Not sure which tool fits your spindle and wheel? Browse our full range of diamond grinding tools, or contact our engineering team for a same-day recommendation.
Frequently asked questions
How often should I dress a diamond grinding wheel?
It depends on the material, bond, and load. In light tool-room work you may dress once a shift; in heavy production, every few hundred parts. Let the surface finish, spindle load, and spark pattern tell you — and log the interval so it becomes predictable.
Can I dress a diamond wheel without coolant?
Only for specific bond types and only with the supplier’s approval. For the majority of diamond and CBN wheels, dry dressing overheats the bond, causes glazing, and risks thermal damage. Flood coolant is the safe default.
What is the difference between dressing and truing?
Diamond grinding wheel dressing restores the cutting ability of the wheel face; truing restores its geometric shape and concentricity. In practice they are often done together, with truing first and a light sharpening pass afterwards.
Does dressing wear out the wheel faster?
Correct, light dressing actually extends wheel life by keeping the wheel cutting freely instead of rubbing. Aggressive or overly frequent dressing, however, does remove usable superabrasive layer and should be avoided.
Final thoughts
Diamond grinding wheel dressing is a skill worth mastering for any shop that grinds hard materials. For any diamond grinding wheel dressing job, keep the passes light, use the right tool, flood the zone with coolant, and log your results — and your wheels will cut faster, run cooler, and last far longer. For a deeper look at bond selection, see our guide on resin vs metal bond diamond wheels, and for grit choices read how to choose diamond grit.
Learn more about the science of superabrasives from Wikipedia and superabrasive materials.